Sim Setup: X-Plane
Since you're here, you've probably gotten yourself a new simulator and want to configure STKP for use with it. This article covers setting up SimToolkitPro for use with X-Plane.
Topics Covered:
Local Setup
A local setup should be used when the simulator and STKP are on the same computer.

Click the Connect To Sim button on the STKP Dashboard, then click the X-Plane logo to enable the use of the sim. A blue tick mark shows the simulator is enabled.

Now that the simulator is enabled, the Settings tab for it will be made available. Head to STKP Settings and look for a new X-Plane tab that appeared at the top of the page and switch to that. Now we need to tell SimToolkitPro where X-Plane 11 is installed. It will try to auto detect the installation folder, but this isn't always possible or successful.
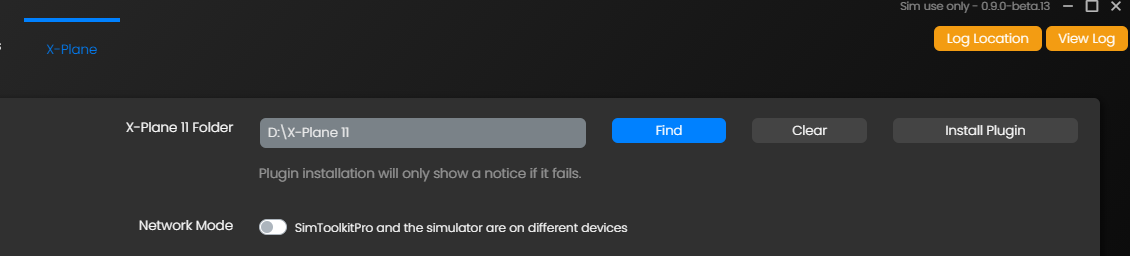
If SimToolkitPro was unable to find your folder, click the 'Find' button to manually locate the directory. This should be set to the location of the X-Plane.exe file. With the folder selected, click the Install Plugin button to copy over the required files. In the event of an error, notices will appear in the top right of the app. Errors are likely to be permissions based, so ensure that the simulator is not running and you have the required rights to place plugins in the folder. You may need to run SimToolkitPro as administrator to do this.
For a local installation you are now done. Starting up X-Plane and loading into an airport, you should now see STKP-Connector in the list of installed plugins using the Plugin Admin menu.

If the plugin isn't present in the list, check your X-Plane Log.txt file for more information on why it isn't being loaded or hop into the STKP Discord to get help from the Support Team.
With the plugin loaded, you should now be able to establish a connection between the sim and SimToolkitPro. Click the Connect X-Plane button on the Dashboard or the Flight Summary page.
Visting the Live Map (or the Flight Summary) page from the sidebar should now show an aircraft icon positioned at the location of your simulator aircraft.
With that, you are ready to fly!
Network Setup
A network setup should be used when the simulator and STKP are on different computers. The process for setting it up differs slightly, but it's nice and simple too. SimToolkitPro for X-Plane over a network can function with any combination of devices and Operating Systems. Sim on Windows, STKP on Linux, Sim on Linux, STKP on Mac - all combinations should work just fine.
The first step is to ensure the plugin is installed in X-Plane, this can be done by either installing and configuring STKP as above locally first, or by viewing the plugin files from the X-Plane setup tab in the Settings page and then manually transferring it over to the simulator.
With the plugin installed the only setup required is to turn on the Network Mode switch in STKP's X-Plane setup tab and ensure the IP is correct for the simulator device. You may need to open port 40303 is on the simulator device firewall. If you're unsure on how to do this, please consult the appropriate documentation.